Monday, December 29, 2008

Baklava

Baklava is a delicious treat--sweet with honey and cinnamon, crisp with filo and butter, rich with nuts. It is so intense that a little piece goes a long way, which means one pan is enough for a crowd.

Depending on whether you're a half-full or half-empty sort of person, this recipe is either simple but time consuming or time consuming but simple. Either way, it's worth the effort!

For the syrup:
1 cup sugar
1 cup water
1/2 inch thick slice of lemon
1 stick cinnamon
1 cup honey

Combine sugar, water, lemon, and cinnamon stick. Bring to a boil. Reduce heat and simmer about 15-20 minutes, until it has the consistency of light syrup (about 1 1/3 cups). Pour into glass measuring cup with the honey. Cool, then remove lemon and cinnamon. This can be made a day in advance and kept, covered, at room temperature--I leave the lemon and cinnamon in until it's time to pour the syrup.Pastry/Filling:
~1 cup ground almonds
~1 cup ground walnuts
1/4 cup sugar
1 Tbsp ground cinnamon
1 pound filo pastry, thawed in refrigerator, then brought to room temperature
2 sticks unsalted butter, melted

Combine nuts, sugar, and cinnamon. It's okay to use up to 2 1/2 cups nuts, but fewer nuts = crisper, flakier pastry.

Skim foam from butter. Brush 9 x 13" pan with butter.

Lay filo on the counter and cover with a damp cloth. This will keep it from drying out and cracking. Gently lift a sheet of dough and spread neatly in the pan. Butter it lightly. Other sheets of dough will be wrinkled to fit in the pan (so rips don't matter) and buttered lightly--brush or dab.

After putting 6 buttered filo sheets in the bottom of the pan, sprinkle with 1/4 of the nut mixture. Top with 1 more buttered sheet, then 1/4 filling. Repeat.

Layer on the remaining filo sheets, buttering each (~9). Spread the top piece out flat and trim the edges to fit the pan.

Carefully cut partway through the layers (down to the beginning of the nut layer) in a diamond pattern: make diagonal cuts, starting at the top (short side) and going to the right (long) side. Then make vertical cuts from top to bottom.

Bake at 325* until the top is golden and crisp and edges pull away from the pan sides,an hour or longer. (The bottom will be darker than the top.)

Pour cool syrup over hot baklava (stay "inside the edges" of the baked pastry). Let stand to absorb the syrup, at least 3 hours. (I cover it loosely with waxed paper.) Cut through the bottom layer and serve.

If you think there is too much pastry on top, you can put more sheets of dough on the bottom instead. It won't make the bottom layer noticeably taller, though.

Friday, December 26, 2008

Fancy Salad

This salad is easy, delicious, and prettier than the photo shows. I almost called it "girlie" salad--its fan base does not skew towards men or children, although some will eat it. Most ladies LOVE it!This recipe explains ingredients and technique rather than amounts.

spring mix greens (prewashed and dried)
balsamic vinaigrette
goat cheese
craisins
walnuts, toasted and chopped coarsely

Toss greens with the dressing; use your hands. Spread salad on a platter or individual plates. Sprinkle with clumps of goat cheese, then craisins, then walnuts. Serve immediately!

Notes:
  • The lettuce starts out fluffy. You'll need a big bowl for mixing, but not as much serving space.
  • I don't know of a tasty brand of balsamic vinaigrette. I make my dressing by blending Good Seasons Italian mix, balsamic vinegar, and extra virgin olive oil.
  • The lettuce will begin to wilt within the hour, so don't dress it until the last possible moment. (And it doesn't need much dressing, either...) I have made this for parties, though, and it is usually eaten before it looks too bad. ;-)
  • For a large batch, I used 1# spring mix and 1/2# of goat cheese. I didn't measure the craisins or nuts--these are pantry staples usually on hand. This filled two oval platters and could probably make 10-16 individual plates.
  • I recommend a platter rather than a bowl because it looks better and it's easier to distribute the "goodies" if they're scattered across the top of the salad. Once you try mixing it all together, you'll find the greens on top, covering up everything else.

Saturday, December 6, 2008

Pomegranate Tutorial

I'm not a big fan of pomegranates (too seedy!), but the rest of the family really likes them. They're a seasonal treat, showing up around November to December.

I learned from Sunset magazine how to prepare them neatly for easy eating. The key is to do most of the work under water to keep the bright red juice from splattering all over.

First I cut the fruit into quarters through the skin. I pull the quarters apart under the water.
The seeds are in little compartments separated by papery walls. Just rub them gently to dislodge. The juicy seeds sink to the bottom while the waste pieces float on top for easy removal.Notice that the water is not as clear as at the beginning? It's discolored from all the juice that did NOT spray on the wall, the coffeemaker, and my shirt!Pour off the floaty bits, rinse, pour off again, and drain.Scoop into your serving bowl and enjoy.
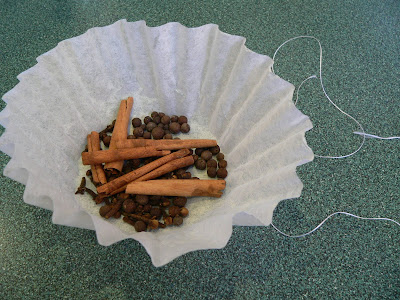
Thursday, November 20, 2008

Hot Spiced Cider

Just the thing for a cold afternoon, this recipe is based on the one from Alice Cantrell's Tea & Cake With the Saints: A Catholic Young Lady's Introduction to Hospitality and the Home Arts.

2 quarts apple cider
2 cinnamon sticks
1 tsp whole allspice
1 tsp whole cloves
(For 1 gallon of cider, just increase to 3 cinnamon sticks and 1 1/2 tsp each allspice and cloves.)

Break the cinnamon sticks once or twice. Combine with other spices in a small piece of cheesecloth or a coffee filter. Tie with UN-waxed dental floss. Float with cider in a saucepan, bring to a boil, and keep warm.
This can also be heated in a crockpot. I don't usually have all day, though, so I microwave it in the insert until the cider is hot, then just keep it warm in the crockpot.

I like to use the rustic cider (vs. the clear bottled kind), but prefer to decant from the jug without shaking it. Too many particles seem to cook together into unappetizing clumps.

Tools of the Trade: Dental Floss

Yes, dental floss! UN-waxed floss is thin and strong, and occasionally quite useful in the kitchen. I've always got some hidden in the back of a drawer.

  • Floss can be used to tie up poultry legs or stuffed pork roast.
  • It does a fine job cutting yeast dough (as in cinnamon rolls). Just ease it under the dough, cross over the top of the dough, and pull in opposite directions.
  • You can use a similar technique to cut cakes into even layers. Position the floss right where you want it around the edge, cross, and pull through.
  • I was making hot spiced cider last week and wanted to keep the spices all together. Not one to keep chesecloth on hand, I fashioned a bag out of a coffee filter and dental floss. It worked very well and was easy to fish out after steeping.

There you have it--a new tool to try. Just make sure it's UN-waxed!

UPDATE: I'm having difficulty finding unwaxed floss. I'll have to settle for unflavored floss for cold applications (cutting dough and cake layers); I still prefer unwaxed for other jobs (in the oven, hot cider).

Cinnamon Rolls

Cinnamon Rolls
This recipe makes two 9" x 13" pans of soft, sweet, buttery, cinnamony rolls. They are irresistible! I've slightly adapted it from a recipe from my mom's friend's mother-in-law, Adelaide.

Rolls:
2 cups milk
1/3 cup cold butter
1/2 cup sugar
1 egg
2 pkg yeast (4 1/2 tsp)
1 tsp salt
6 cups (+) flour

Filling:
1 cup softened butter
1 1/3 cups sugar
2 Tbsp cinnamon

Icing:
3 cups powdered sugar
cream or milk
splash of vanilla, optional

Heat the 2 cups milk (but don't boil). Pour into mixing bowl and add butter, cut in chunks. Let butter melt (which will cool the milk, too). When the milk is lukewarm (105-115 degrees F), add sugar, egg, and yeast. Let it stand for about 5 minutes, until the yeast begins to foam. Add salt and 3 cups flour, mixing well. Add remaining flour and knead into a soft dough. You may need more flour. (In a Kitchen Aid mixer, mix on speed 2 until the dough clears the sides of the bowl--sprinkling more flour if necessary--then mix for 2 more minutes.) Cover and let rise until doubled.

Meanwhile, combine filling ingredients.

Punch down the risen dough. Roll 1/2 the dough into a rectangle, about 12" x 18". I like to work on freezer paper taped to the counter. I made a few marks on it to guide the size of my rectangle. Spread with the filling, leaving about 1/2" strip of dough plain. Roll up the dough along the long side and pinch the edges to seal.

[I misread the recipe this time--that picture shows only HALF the recommended filling...]
Cut into 20 pieces. I cut the long roll in half, then each of those in half, leaving four smaller logs. Cut each of these into 5 pieces. Try to make the thicknesses similar. Some rolls will be wider than others, because the center of your original roll is bigger than the ends. Just put the smaller ones in the middle of the pan. Lay these 20 rolls in a greased 9" x 13" pan. Repeat with remaining dough.
I make the first cut with a knife, but use unwaxed dental floss (or at least unflavored, if that's all I can find) for all the rest. Ease it under the dough and wrap it around the top. Pull the two ends in opposite directions, and you'll make a beautiful, clean cut that doesn't smush the roll out of shape.

Cover and let rise again until almost double. Bake at 350 degrees for 15-20 minutes, or until lightly browned. I bake only one pan at a time.

Glaze while hot or warm or cool. Mix the powdered sugar with cream or milk (and optional vanilla) to achieve the proper consistency. If you are glazing hot rolls, make the icing very thick; it will melt all over. The cooler the rolls, the thinner your icing can start out. You may want to spread icing on one roll and watch it for a few minutes to decide whether or not to add more milk.

These are, of course, best eaten warm. Microwaving a cool roll for just a few seconds works wonders.

Make-ahead tips:
The rolls pictured here were mixed, risen, spread, and cut one night then put in the fridge. In the morning I warmed the oven SLIGHTLY, put a Pyrex of boiling water on the floor, and let the rolls rise in there. Then I baked one pan at a time.

My mom and I have had success baking the rolls ahead and then freezing them (uniced and out of the pan) wrapped in plastic and foil. When ready to serve, just put in pans, thaw (overnight at room temperature), warm in the oven (covered with foil), and glaze.

I think they are best freshly baked, so for Christmas 2008 I am going to try freezing the raw sliced rolls, thawing them in the fridge, and baking in the morning. I'll update the recipe with my success or failure.

UPDATE: I made the Christmas rolls just a day ahead, but my sister froze some shaped rolls. She said they thawed and baked up beautifully. Now we know!

Note: I've copied all this text below without pictures for anyone who wants to print just the recipe. Bon Appetit!

Bonus picture: Here's the island late at night after roll making and birthday decorating. Yes, I went to bed with it looking like that! I did get up early enough to raise and bake the rolls and get everything clean again. I must clear and wash that thing at least three times a day...

Cinnamon Rolls
This recipe makes two 9" x 13" pans of soft, sweet, buttery, cinnamony rolls. They are irresistible! I've slightly adapted it from a recipe from my mom's friend's mother-in-law, Adelaide.

Rolls:
2 cups milk
1/3 cup cold butter
1/2 cup sugar
1 egg
2 pkg yeast (4 1/2 tsp)
1 tsp salt
6 cups (+) flour

Filling:
1 cup softened butter
1 1/3 cups sugar
2 Tbsp cinnamon

Icing:
3 cups powdered sugar
cream or milk
splash of vanilla, optional

Heat the 2 cups milk (but don't boil). Pour into mixing bowl and add butter, cut in chunks. Let butter melt (which will cool the milk, too). When the milk is lukewarm (105-115 degrees F), add sugar, egg, and yeast. Let it stand for about 5 minutes, until the yeast begins to foam. Add salt and 3 cups flour, mixing well. Add remaining flour and knead into a soft dough. You may need more flour. (In a Kitchen Aid mixer, mix on speed 2 until the dough clears the sides of the bowl--sprinkling more flour if necessary--then mix for 2 more minutes.) Cover and let rise until doubled.

Meanwhile, combine filling ingredients.

Punch down the risen dough. Roll 1/2 the dough into a rectangle, about 12" x 18". I like to work on freezer paper taped to the counter. I made a few marks on it to guide the size of my rectangle. Spread with the filling, leaving about 1/2" strip of dough plain. Roll up the dough along the long side and pinch the edges to seal.

Cut into 20 pieces. I cut the long roll in half, then each of those in half, leaving four smaller logs. Cut each of these into 5 pieces. Try to make the thicknesses similar. Some rolls will be wider than others, because the center of your original roll is bigger than the ends. Just put the smaller ones in the middle of the pan. Lay these 20 rolls in a greased 9" x 13" pan. Repeat with remaining dough.

I make the first cut with a knife, but use UN-waxed dental floss for all the rest. Ease it under the dough and wrap it around the top. Pull the two ends in opposite directions, and you'll make a beautiful, clean cut that doesn't smush the roll out of shape.

Cover and let rise again until almost double. Bake at 350 degrees for 15-20 minutes, or until lightly browned. I bake only one pan at a time.

Glaze while hot or warm or cool. Mix the powdered sugar with cream or milk (and optional vanilla) to achieve the proper consistency. If you are glazing hot rolls, make the icing very thick; it will melt all over. The cooler the rolls, the thinner your icing can start out. You may want to spread icing on one roll and watch it for a few minutes to decide whether or not to add more milk.

These are, of course, best eaten warm. Microwaving a cool roll for just a few seconds works wonders.

Make-ahead tips:
The rolls pictured here were mixed, risen, spread, and cut one night then put in the fridge. In the morning I warmed the oven SLIGHTLY, put a Pyrex of boiling water on the floor, and let the rolls rise in there. Then I baked one pan at a time.

My mom and I have had success baking the rolls ahead and then freezing them (uniced and out of the pan) wrapped in plastic and foil. When ready to serve, just put in pans, thaw (overnight at room temperature), warm in the oven (covered with foil), and glaze.

I think they are best freshly baked, so for Christmas2008 I am going to try freezing the raw sliced rolls, thawing them in the fridge, and baking in the morning. I'll update the recipe with my success or failure.

Bon Appetit!

Sunday, September 28, 2008

New England Clam Chowder

This recipe is adapted from one in Sunset's Favorite Recipes II. Yield: 4 quarts

butter, approximately 2 Tbsp
1 large onion, chopped
1 cup chopped celery
4 cups potato cubes (1/2" dice, thin-skinned potatoes--NOT baking potatoes)
1/4 cup finely chopped parsley
4 cans (6 1/2 oz. each) chopped or minced clams
2 (12 oz. each) bottles clam juice
4 cups whole milk
3 Tbsp cornstarch
salt and pepper to taste
more chopped parsley for garnish
  • Melt butter. Add onion and cook, stirring occasionally, until onion softens. Add celery and cook for a few more minutes.
  • Drain clams, pouring liquid into a four cup measure. Add enough clam juice to total four cups. (Reserve clams for later.)
  • Add clam juice, potatoes, and parsley to the soup pot. Bring to a boil, lower heat, and simmer until potatoes are tender but not mushy, 20-30 minutes.
  • Whisk cornstarch into milk and add to soup. Add clams. Bring to a simmer (stir frequently) and let it bubble several minutes, until slightly thickened.
  • Season with salt and pepper to taste. Garnish with parsley, if desired.
  • Serve with grated cheese and/or bacon bits if desired.

Notes:
  • I think this could have used less milk and possibly more potatoes.
  • I'm probably more generous with onion and celery than the recipe calls for.
  • I really don't notice a thickening due to the cornstarch, but have always added it per the original recipe.

Tuesday, September 23, 2008

Plum Crisp

I'm still buying big boxes of Italian plums, but we can eat only so much kuchen. Next on the agenda: plum crisp.

I adapted the filling from a recipe on epicurious, and covered it with my favorite crisp topping.
Topping:
3/4 cup butter
1 cup plus 2 Tbsp light brown sugar
1 1/2 cups oatmeal
1 1/2 cups flour

Melt butter. Add remaining ingredients. Mix thoroughly and spread in 9 x 13" pan. Bake at 350* until golden brown, stirring every 10 minutes (~30 min. total). Set aside (it will crisp as it cools).

Filling:
3 pounds Italian prune plums (~44)
1/2 cup sugar
3/4 cup water
4 tsp cornstarch
  • Halve and pit plums. Cut into 8 chunks each.
  • In a large skillet cook plums and sugar over medium heat, stirring, until sugar is melted.
  • Combine water and cornstarch in small bowl or mixing cup. Stir into plum mixture and simmer, stirring, until liquid clears and thickens.
  • Pour into 9 x 13" pan and bake about 30 minutes at 350*.
  • Remove from oven. When mixture stops bubbling (or later), sprinkle with topping. Serve warm or cold.
Below is the filling shortly after removal from the oven:And here is the completed crisp:Okay, I can hear the complaining already: "Why should I bother to cook the topping separately? What a hassle! Why is she so picky? I always top the fruit before baking." Well, friends, I made my first batch the old way, and this is what it looked like:
Not so pretty, huh? As the fruit cooked, it bubbled all over the topping. Most of it was gooey and chewy rather than crisp and light. (It didn't help that I made too much topping in the first place.) Cooking the streusel separately is well worth it, and isn't much extra effort. It can even be done (in its own pan) at the same time the fruit is cooking. Opening the oven to stir isn't a problem.
Additional notes:
  • You can add 1-3 tsp cinnamon to the topping.
  • I made this twice, and had 43 and 44 plums in 3 pounds. Your plums' sizes may vary, so weight is a more reliable measure. If I make this again soon I'll try to remember to record the volume (in cups) of cut fruit.
  • If there is more topping than you care for, don't sprinkle it all on the plums. Keep the extra in a container (mine is in the fridge) to sprinkle on ice cream or applesauce or whatever. It's hard to go wrong with brown sugar and butter...
  • UPDATED 9/26: We (Joe and Marianna helped) made another today and had 8 cups of cut fruit.
  • Another lesson learned the hard way: If you're going to take this to a friend's house, wait to put the topping on when you get there so the jiggling in the car doesn't make it sink. Waah...

Tuesday, September 2, 2008

Oma's Plum Kuchen

When those Italian plums (prune plums) show up in the grocery store in late summer, I always think of Oma. She had a dough recipe that she used for making sticky buns, pineapple rolls, and most importantly, plum kuchen (koo-ken). She was a loving grandmother and a great cook, and was so generous with her time and talent. (Among other things, she made me some special birthday cakes and gave me the cake decorating bug.)

I hardly ever buy the plums or try to bake with them myself, but this year I went crazy and bought a five pound box at Costco! Let me tell you, that is A LOT of little plums! I came home and almost desperately prepared a batch of kuchen. Yum! I finished the box a few days later with another 1/2 batch, which is documented below. I've adapted it a bit, as is my usual practice (can't leave well enough alone...). Enjoy.

By the way, there are many kinds of kuchen. This one is essentially bread and fruit, and is only lightly sweetened. I think some are much sweeter and cakier in texture, but this is the kuchen I've always known and loved.

Kuchen
2 cups milk
2 pkgs yeast (4 1/2 tsp)
2 Tbsp instant potato
4 Tbsp butter
1/2 cup sugar
1 1/2 tsp salt
6-7 cups flour
1 egg
Italian plums (40-50)
cinnamon sugar
  • Heat milk to 105-115* and pour some into the mixing bowl of a stand mixer. Add instant potato and yeast and stir to dissolve.
  • Add butter to the remaining milk and heat just enough to melt the butter. Add sugar and salt, stir, and set aside to cool slightly.
  • Add some flour to the yeast mixture and mix on low speed. Add egg and some more flour and continue mixing. Gradually add the warm milk/butter mixture and continue mixing. Continue adding flour in small amounts (speed 2 on Kitchen Aid) until the dough is smooth and leaves the sides of the bowl. Let it continue mixing for 2 more minutes.
  • Turn dough out and lightly oil the mixing bowl. Form the dough into a ball and put it back into the bowl, turning it over so all surfaces are greased. Cover with plastic wrap and let rise until double in size (40-80 minutes). Punch down dough and let it rise 2 more times.
  • Punch down the dough a final time, and turn it out onto a lightly floured surface. Let it rest while you grease your pans. Roll out the dough (it will be thin) and place in pans.
  • Sprinkle dough with cinnamon sugar, cover with plum halves (skin side down), and sprinkle again with cinnamon sugar. Let rise again, then bake at 350* for 25 minutes. Best eaten warm!
  • Yield: 7 round cake pans or 2 (~11 x 17") jelly roll pans/baking sheets with sides

Notes:

  • Most of the dough ingredients can be added in any order. Just don't add the salt to the initial yeast mixture, and don't add the hot milk/butter until there are enough other ingredients to stop that heat from overwhelming and killing the yeast.
  • Quicker rising: Boil water in the microwave (in a Pyrex measuring cup). Leave the cup of water in there and put in the mixing bowl of dough. It's now in a very warm, humid environment.
  • The second and third rises are much quicker than the first. Be ready.
  • The dough may have to rest now and then during rolling out. You'll know because it will keep pulling back and resisting your stretching. Leave it for a few minutes until it is cooperative again.
  • The first time, I misread the recipe and baked the kuchen at 375* for 20 minutes. It was just as good.
  • Oma's recipe said the dough would be less than 1/2", but I was nervous because it was MUCH thinner. This picture doesn't do it justice--I'll bet it was below 1/4".
Here's a picture of a panful of dough and fruit. The fruit looks HUGE on the thin layer of dough--don't worry! All will be well. (The white stuff in the lower left corner is sparkle sugar I added. Don't bother--most of it melted, and what remained wasn't worth the effort.)
Below is the unrisen dough with raw plums on it. Notice how much of the pan sides you can see.
See the puffiness now just before going into the oven.
And the extra rise from baking. Don't the plums look luscious now?
Kuchen is best eaten warm from the oven. It is also excellent the next day for breakfast (wrap tightly), IF you microwave it for a few seconds to freshen it up.
Thanks, Oma, for all the love.

Indian Cheese and Nut Dessert Balls

This recipe comes from Sundays at Moosewoood Restaurant, page 320.

1 1/2 cups chenna
1/3 cup confectioner's sugar
3/4 tsp grated orange rind
2-4 tsp orange juice
1/8 tsp cinnamon
1/2 cup finely chopped almonds or pistachios (we needed LESS)
optional garnish: mandarin oranges

Place the chenna in a bowl and add the remaining ingredients, except the nuts and orange sections. Mash until smooth with a spoon or your fingers. Form the mixture into a dozen or so walnut-sized balls (We made them smaller.) and roll each ball in the chopped nuts to coat. Chill until ready to serve.

If you've used freshly made chenna, these dessert balls will keep for 3 or 4 days if tightly wrapped and refrigerated.